

Showing your Hashnode blog posts on your Laravel blog using Hashnode Public APIs In this post, I'm going to show you how to build All of the API endp


In this post, I'm going to show you how to build a Laravel blog and pull in blog posts from a Hashnode blog using its public API.
All of the API endpoints are public, no authentication will be required.
What is Hashnode public API?
The Hashnode Public API is a GraphQLAPI that allows access to data from Hashnode's servers. Using these endpoints Laravel Hosting, information can be read such as blog posts, comments, and user details. For our purposes, this post will focus on fetching blog post data.
Why use headless Hashnode?
With headless Hashnode, you can build a fully bespoke design on your domain whilst still using Hashnode's blogging platform as your backend for managing your posts and pages.
Hashnode's GraphQL API
To consume Hashnode's public API you will need to use a client that can read GraphQL. Hashnode has a GraphQL playground you can use to try out its API right away by going to gql.hashnode.com and trying the examples at apidocs.hashnode.com/#introduction-item-9
All GraphQL API calls are performed by sending a POST request to gql.hashnode.com and a query in the body.
Using GraphQL with Laravel
Before we get into the weeds of building let's figure out how we can consume GraphQL with Laravel.
Several tools can be used listed on graphql.org/code/#php
Since we are using Laravel Hosting we don't need to install any third-party tools, instead, we can use Laravel's built-in HTTP Client laravel.com/docs/10.x/http-client
This allows us to run GraphQL queries, here's a quick example.
$response = Http::post("https://gql.hashnode.com", [
    'query' => 'query Publication {
      publication(host: "dcblog.dev") {
        author {
          followersCount
        }
      }
    }'
]);
This sends a POST request to gql.hashnode.com and requests a publication (in this example from dcblog.dev an existing Hashnode blog.) Get the number of followers from the blog author.
The HTTP client returns a response we can then convert into JSON using the JSON method.
$response->json()
From here we can extract the data from the response:
$followers = $response->json()['data']['publication']['author']['followersCount'];
Installing Laravel
To install a fresh copy of Laravel using Composer, use the following command in a terminal.
This will create a new Laravel Hosting project called hashblog. You can name this anything you like.
composer create-project laravel/laravel hashblog
Defining a Route for the Posts
Open routes/web.php to create our first route
Delete the default route:
Route::get('/', function () {
    return view('welcome');
});
Create a route that responds to / which loads a controller called BlogController and loads a method called index
use App\Http\Controllers\BlogController;
use Illuminate\Support\Facades\Route;

Route::get('/', [BlogController::class, 'index']);
Making a BlogController
Create the controller with artisan, in a terminal type:
php artisan make:controller BlogController
This will create app/Http/Controllers/BlogController.php
Delete the use statement, we won't be needing it.
use Illuminate\Http\Request;
<?php

namespace App\Http\Controllers;

use Illuminate\Http\Request;

class BlogController extends Controller
{
    //
}
Create a method called index, that returns a response using the HTTP::client copy and paste the example from the Hashnode API docs to fetch posts apidocs.hashnode.com/#introduction-item-9
<?php

namespace App\Http\Controllers;

use Illuminate\Support\Facades\Http;

class BlogController extends Controller
{
    public function index()
    {
        return Http::post("https://gql.hashnode.com", [
            'query' => 'query Publication {
              publication(host: "blog.developerdao.com") {
                isTeam
                title
                posts(first: 10) {
                  edges {
                    node {
                      title
                      brief
                      url
                    }
                  }
                }
              }
            }'
        ]);
    }
}
This will output the JSON response from the API:
{
  "data": {
    "publication": {
      "isTeam": true,
      "title": "Developer DAO Blog | Web3 Tutorials",
      "posts": {
        "edges": [
          {
            "node": {
              "title": "Unleash the Power of DeFi on Bitcoin",
              "brief": "If you've been building on Ethereum and EVM-compatible chains and yet are intrigued by the potential of Bitcoin, this post is for you. We will talk about Stacks, a Bitcoin layer 2, and how it will unlock $500B+ of Bitcoin liquidity for everyday apps....",
              "url": "https://blog.developerdao.com/unleash-the-power-of-defi-on-bitcoin"
            }
          },
        ]
      }
    }
  }
}
To reference any of the keys inside this array is a case of assigning the response to a variable and then calling a JSON method:
$response = Http::post(...)

$response->json()
To get the posts out, skip the first few elements:
$response->json()['data']['publication']['posts'];
This would then return the contents of the post's key.
Let's look at the query a little closer:
query Publication {
  publication(host: "blog.developerdao.com") {
    isTeam
    title
    posts(first: 10) {
      edges {
        node {
          title
          brief
          url
        }
      }
    }
  }
}
The query always starts with the word query followed by the type of query. Next, we set publication() and set the host. The host is the Hashnode blog to read from.
Inside the brackets set the fields that you want to be returned in this case isTeam and title are used which returns a bool for if this blog is a team or not and its title.
Next, we're using posts(first: 10) to call its posts and pull the first 10 records out. Next inside the edges and node we set which fields we want for the post data.
To see all field options for a post see the Hashnode API docs apidocs.hashnode.com/#definition-Post
The fields I'll be using for posts are as follows:
title
slug
brief
readTimeInMinutes
publishedAt
views
url
coverImage {
  url
}
tags {
  name
  slug
}
author {
  name
  username
  profilePicture
}
The update query now looks like this: (I've switched the host to my blog)
I've dropped isTeam and title from the publication as well, we won't be needing them.
In addition, we only want to return the posts so we set all the keys to get to the posts using
$response->json()['data']['publication']['posts']['edges']
$response = Http::post("https://gql.hashnode.com", [
    'query' => 'query Publication {
      publication(host: "dcblog.dev") {
        posts(first: 10) {
          edges {
            node {
                title
                slug
                brief
                readTimeInMinutes
                publishedAt
                views
                url
                coverImage {
                  url
                }
                tags {
                  name
                  slug
                }
                author {
                  name
                  username
                  profilePicture
                }
            }
          }
        }
      }
    }'
]);

return view('blog.index', [
    'posts' => $response->json()['data']['publication']['posts']['edges']
]);
To pass the posts to a view, assign the data to an array and pass it to a view called blog/index.blade.index as above.
The index method now looks like this:
public function index()
{
    $response = Http::post("https://gql.hashnode.com", [
        'query' => 'query Publication {
          publication(host: "dcblog.dev") {
            isTeam
            title
            posts(first: 10) {
              edges {
                node {
                    title
                    slug
                    brief
                    readTimeInMinutes
                    publishedAt
                    views
                    url
                    coverImage {
                      url
                    }
                    tags {
                      name
                      slug
                    }
                    author {
                      name
                      username
                      profilePicture
                    }
                }
              }
            }
          }
        }'
    ]);

    return view('blog.index', [
        'posts' => $response->json()['data']['publication']['posts']['edges']
    ]);
}
Create the view:
php artisan make:view blog.index
This will create a folder called blog inside resources/views and a view called index.blade.php.
Inside the index file enter:
@foreach($posts as $post)

    @php $post = $post['node']; @endphp

    <h2>{{ $post['title'] }}</h2>

    <div>
        {!! Str::limit($post['brief'], 100) !!}
    </div>

    <a href="{{ url($post['slug']) }}">Read More</a>

    <hr>

@endforeach
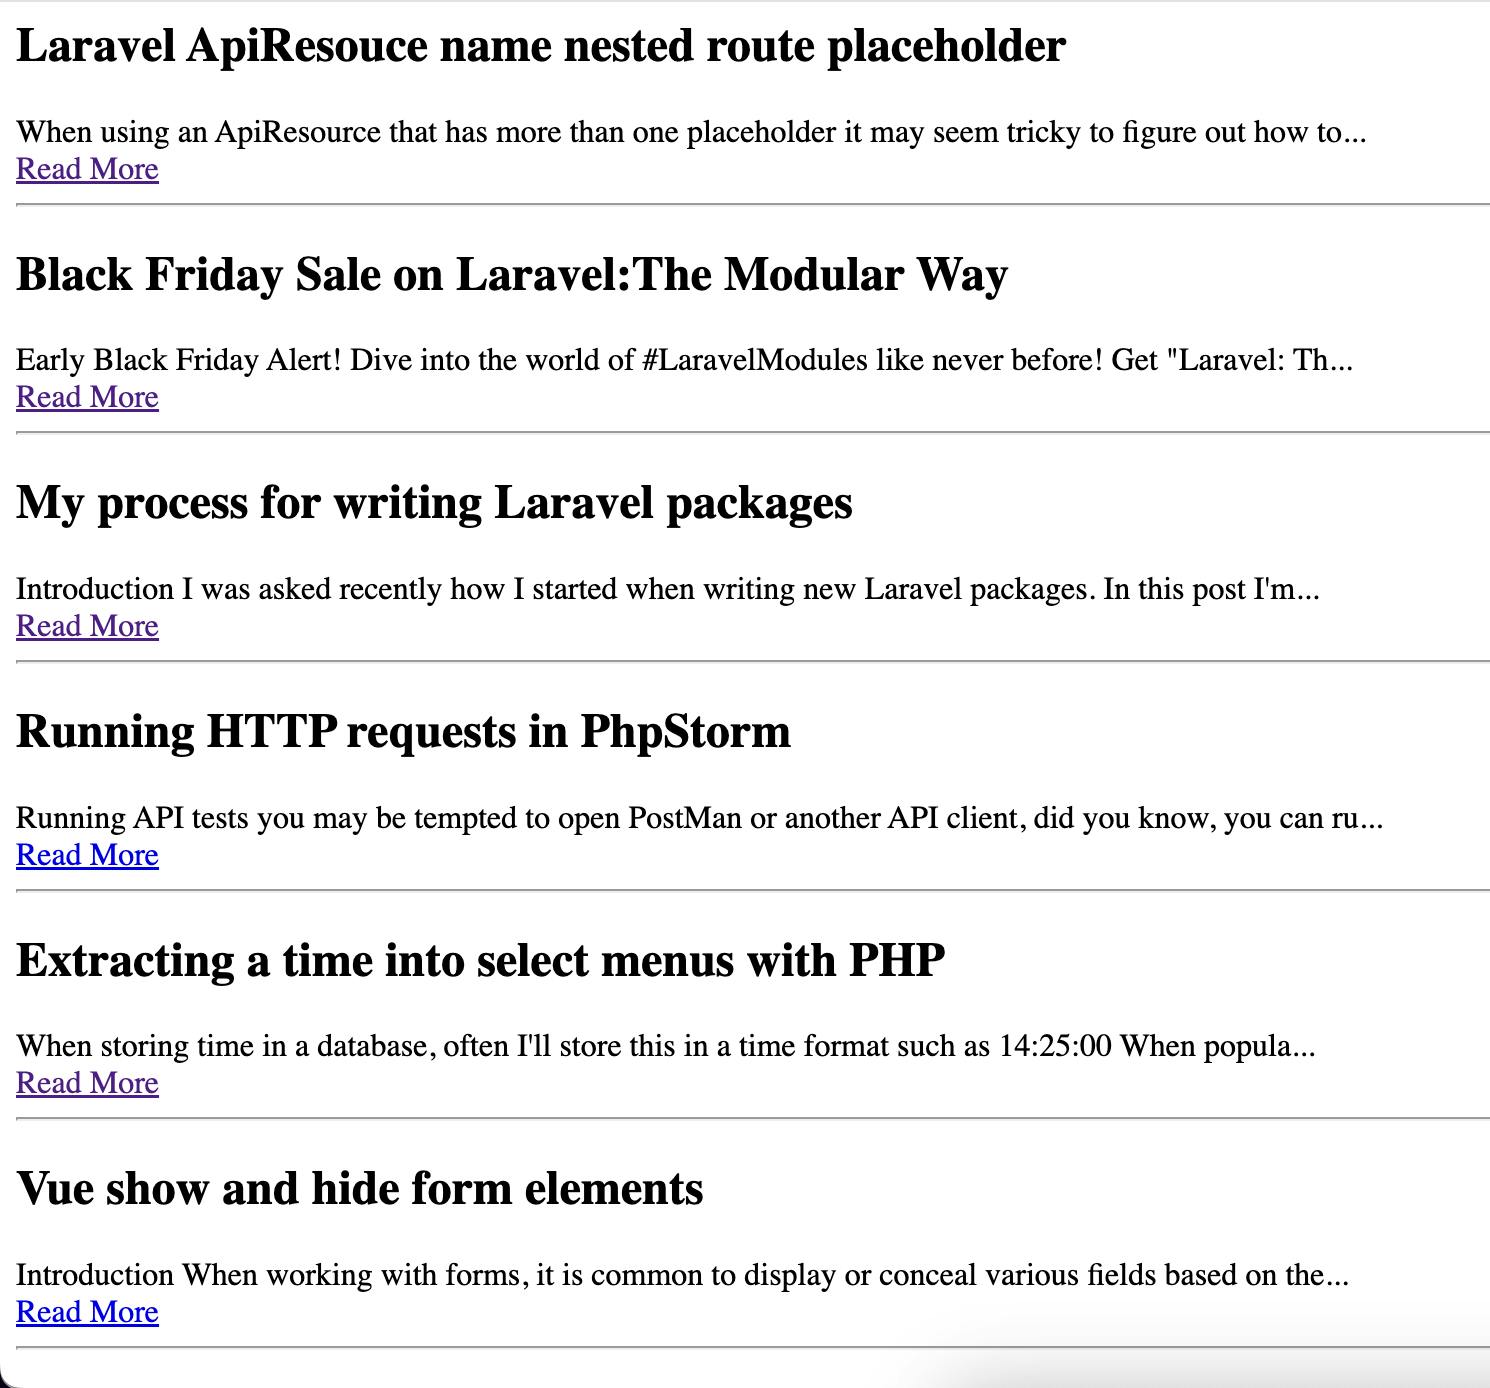
This is enough to see the results in a browser without any styling of any kind. This is not using all the fields either, we will add those in shortly.
Viewing the project in a browser will look like the below image.
It's not pretty but it's working!
Cleaning up the controller
Whilst our code is working, to me there's too much happening inside the controller. It would be better if the controller could load another class that returns the posts and the controller loads them like this:
return view('blog.index', [
    'posts' => $hashnodeService->getPosts()['edges']
]);
Let's do some refactoring to extract the Hashnode API lookup to a dedicated class.
Let's make a folder called Services inside the app folder. Create a new file inside the services folder called HashnodeService.php
Create the following class:
<?php

namespace App\Services;

use Illuminate\Support\Facades\Http;

class HashnodeService
{
    protected string $host;
    protected string $url;

    public function __construct()
    {
        $this->host = config('services.hashnode.host');
        $this->url = config('services.hashnode.url');
    }

    public function getPosts(): array
    {
       //get the posts
    }
}
Inside the __construct we assign values to host and url These will come from a config file.
The host is the Hashnode blog and the url is the API endpoint we post to.
Rather than hard-coding these, we move them to a configuration file.
Hashnode service keys
Open config/services.php
Add an array of keys:
'hashnode' => [
    'host' => env('HASHNODE_HOST'),
    'url' => env('HASHNODE_URL', 'https://gql.hashnode.com/')
],
This allows the host to be read from your .env file. For the url we will hard code the API path, this can also be set in your .env but when not set the default path will be picked up automatically.
Inside your .env file set a value of the host to read from.
With this setup, you can switch which Hashnode blog is read from a single place.
HASHNODE_HOST='dcblog.dev'
Adding methods to HashnodeService
Switch back to the HashnodeService class. Next, create a method for each type of query for now we only have one called getPosts(). This will return an array of posts.
Move the query from the BlogController's index method to this method:
public function getPosts(): array
{
    $response = Http::post($this->url, [
        'query' => 'query Publication {
          publication(host: "' . $this->host . '") {
            posts(first: 10) {
              edges {
                node {
                  title
                  slug
                  brief
                  readTimeInMinutes
                  publishedAt
                  views
                  url
                  coverImage {
                    url
                  }
                  tags {
                    name
                    slug
                  }
                  author {
                    name
                    username
                    profilePicture
                  }
                }
              }
            }
          }
        }'
    ]);

    $publication = $response->json()['data']['publication'];

    if ($publication === null) {
        abort(400, 'Hashnode host not found');
    }

    return $publication['posts'];
}
This method now returns a list of posts from the Hashnode blog and if the blog cannot be found we fire off a 400 bad request event. Otherwise, the array of posts is returned.
Next, we need to call this class from our controller using dependency injection. This means in the index method we specify the class by its name and then define a variable reference. Laravel will automatically create an instance of this class for us.
Remember to import the class in a use statement.
<?php

namespace App\Http\Controllers;

use App\Services\HashnodeService;

class BlogController extends Controller
{
    public function index(HashnodeService $hashnodeService)
    {
        return view('blog.index', [
            'posts' => $hashnodeService->getPosts()['edges']
        ]);
    }
}
With this in place, our controller is now much cleaner and is only responsible for passing the posts of the views, the HashnodeService class will load the posts.
Designing the blog
Let's revisit the front end. Right now our view page has no styling at all. The first step will be to install Tailwind which is my CSS framework of choice, feel free to any something else.
Installing TailwindCSS
Install Tailwind by entering the following in a terminal:
npm install -D tailwindcss postcss autoprefixer
npx tailwindcss init -p
npm install -D @tailwindcss/typography
This will install Tailwind and update the package.json file. Also, a tailwind.config.js file will be created.
Open tailwind.config.js and paste in the following:
/** @type {import('tailwindcss').Config} */
export default {
  content: [
    "./resources/**/*.blade.php",
    "./resources/**/*.js",
    "./resources/**/*.vue",
  ],
  theme: {
    extend: {},
  },
  plugins: [
      require('@tailwindcss/typography'),
  ],
}
Next open resources/css/app.css and paste in:
@tailwind base;
@tailwind components;
@tailwind utilities;
To compile Tailwind at any time run the build command:
npm run build
Using layouts
Let's create a layout file and set up a foundation for styling the blog.
Inside the resources/views folder create another folder called layouts and create a file inside called app.blade.php
This will be the main layout file for our blog.
@yield is used to create placeholders that our views can inject code into.
In this layout, we have placeholders for title, meta, and content.
<!doctype html>
<html>
<head>
  <meta charset="utf-8">
  <meta name="viewport" content="width=device-width, initial-scale=1.0">
  <title>@yield('title') - {{ config('app.name') }}</title>
  <link rel="canonical" href='{{ url()->current() }}'>
  @vite(['resources/css/app.css', 'resources/js/app.js'])
  @yield('meta')
</head>
<body class="bg-gray-900 text-white">

    <div class="container px-8 mx-auto">
      @yield('content')
    </div>

</body>
</html>
Now open up blog/index.blade.php.
Update this to use the layout and set the title and content section:
@extends('layouts.app')
@section('title', 'Blog')
@section('content')

    @foreach($posts as $post)

        @php $post = $post['node']; @endphp

        <h2>{{ $post['title'] }}</h2>

        <div>
            {!! Str::limit($post['brief'], 100) !!}
        </div>

        <a href="{{ url($post['slug']) }}">Read More</a>

        <hr>

    @endforeach

@endsection
Looking at the browser the application now looks like this:
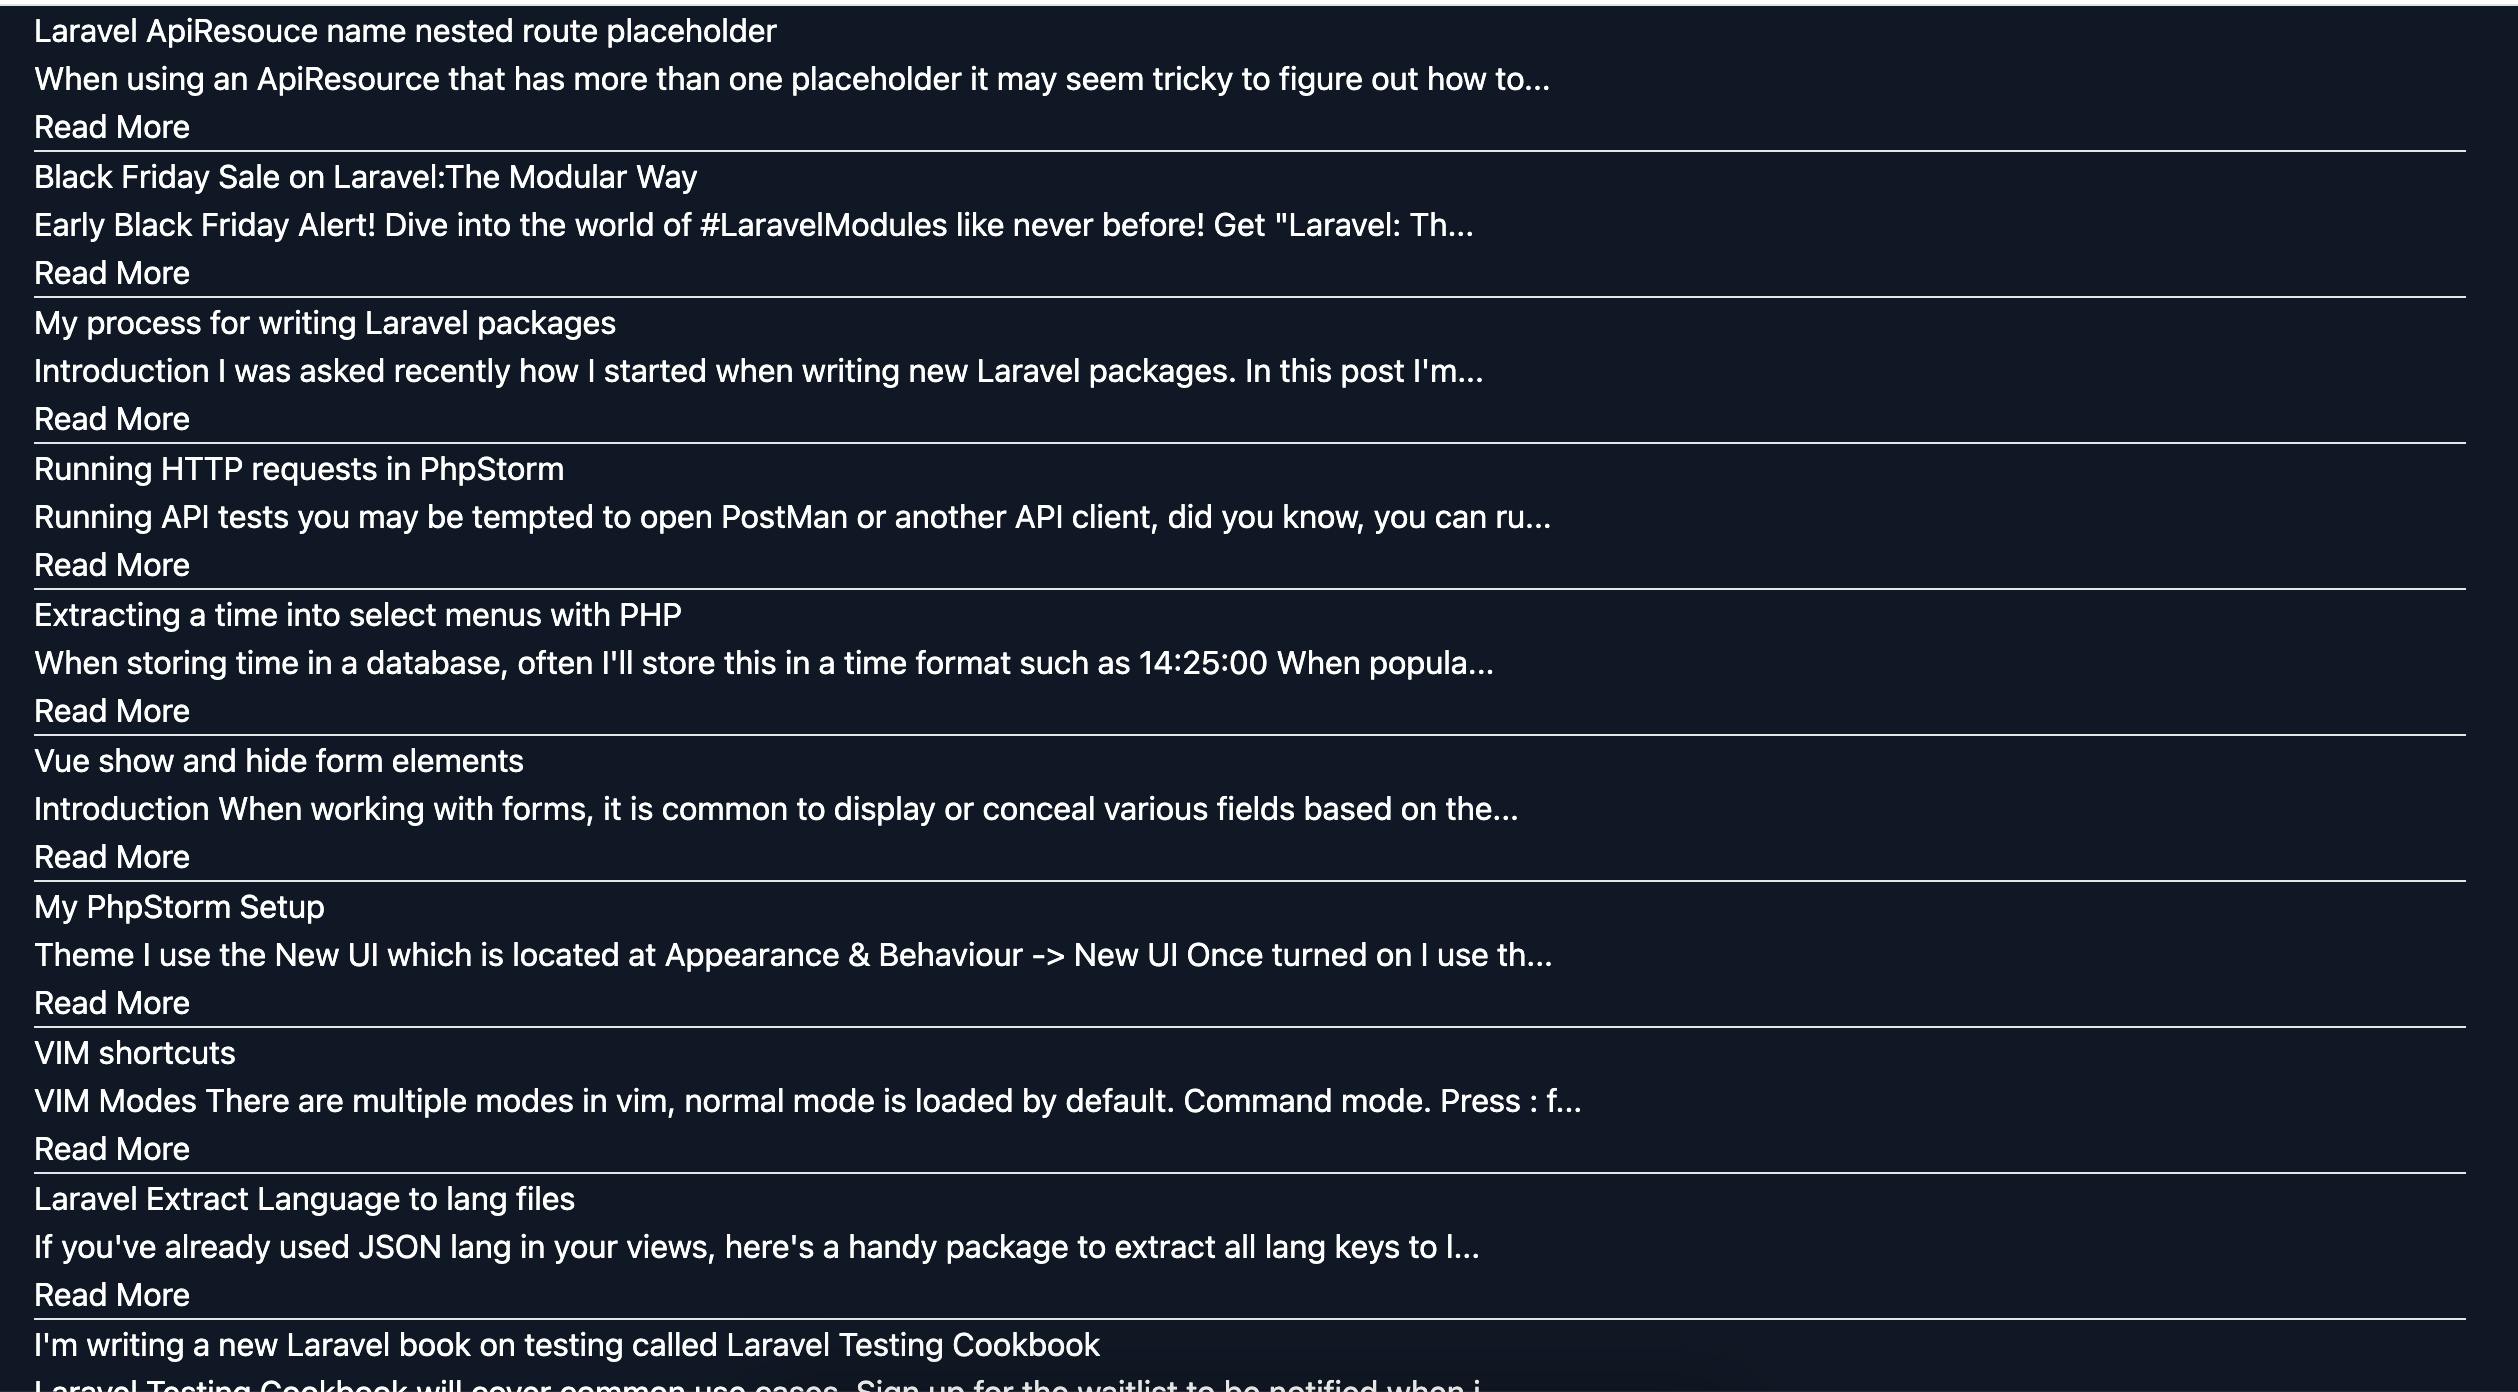
Still looking terrible but we can see the classes used in the layout file are taking effect. Go back to the layout file and let's add a simple navbar.
Since we're in "design mode" meaning we're adding new tailwind classes, it's best to run npm run dev so the Vite will recompile our CSS file as we make changes.
Inside the body of the layout file add:
<nav class="bg-indigo-800 shadow py-2 mb-10">
    <div class="max-w-7xl mx-auto px-2 sm:px-4 lg:px-8">
        <div class="flex-shrink py-2">
            <div class="flex px-2 lg:px-0">

                <a href='{{ url('/') }}'>
                    <div class="flex items-center">
                        <div class="block px-1 pt-1 text-sm font-medium leading-5 text-white hover:text-gray-300">
                            <div>{{ config('app.name') }}</div>
                        </div>
                    </div>
                </a>

                <div class="flex flex-grow justify-between">

                    <div class="lg:ml-6 lg:flex">

                        <a href="/" class="ml-8 inline-flex items-center px-1 pt-1 text-sm text-white hover:text-gray-300">Blog</a>

                    </div>

                </div>

            </div>

        </div>
    </div>

</nav>
Now we have a header that looks like this:
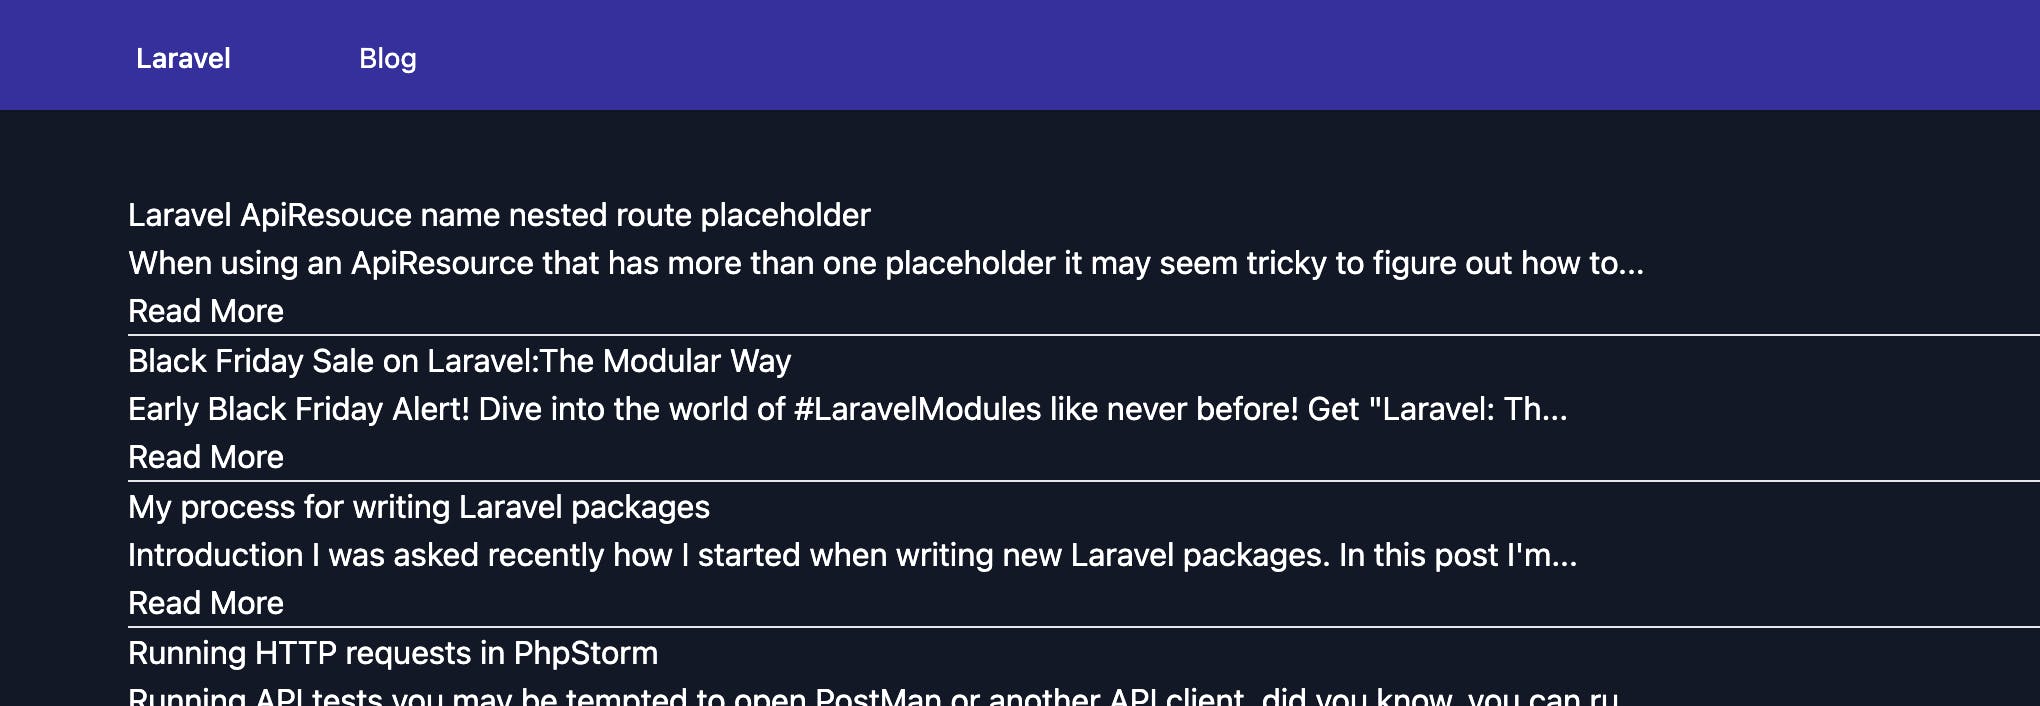
Next, we will tackle the blog posts, but first, let's do a bit of cleanup.
Create a new blade file called posts.blade.php inside the blog folder and cut and paste the foreach loop from index.blade.php into the posts.blade.php file
Inside index.blade.php add:
@include('blog.posts', ['posts' => $posts])
This will load the posts, the reason for this is you may want to load posts for different files later on such as a tags page or a search page. It's better to have the posts in its own file so it can be included in other files as needed.
@extends('layouts.app')
@section('title', 'Blog')
@section('content')

    @include('blog.posts', ['posts' => $posts])

@endsection
Now open posts.blade.php we are ready to start styling the page and add more details to the posts.
Right now posts.blade.php looks like this:
@foreach($posts as $post)

    @php $post = $post['node']; @endphp

    <h2>{{ $post['title'] }}</h2>

    <div>
        {!! Str::limit($post['brief'], 100) !!}
    </div>

    <a href="{{ url($post['slug']) }}">Read More</a>

    <hr>

@endforeach
The first thing we want is a grid for the posts to go into, before the @foreach add:
<div class="grid gap-5 max-w-lg mx-auto lg:grid-cols-3 lg:max-w-none">
     @foreach($posts as $post)
        ...
     @endforeach
</div>
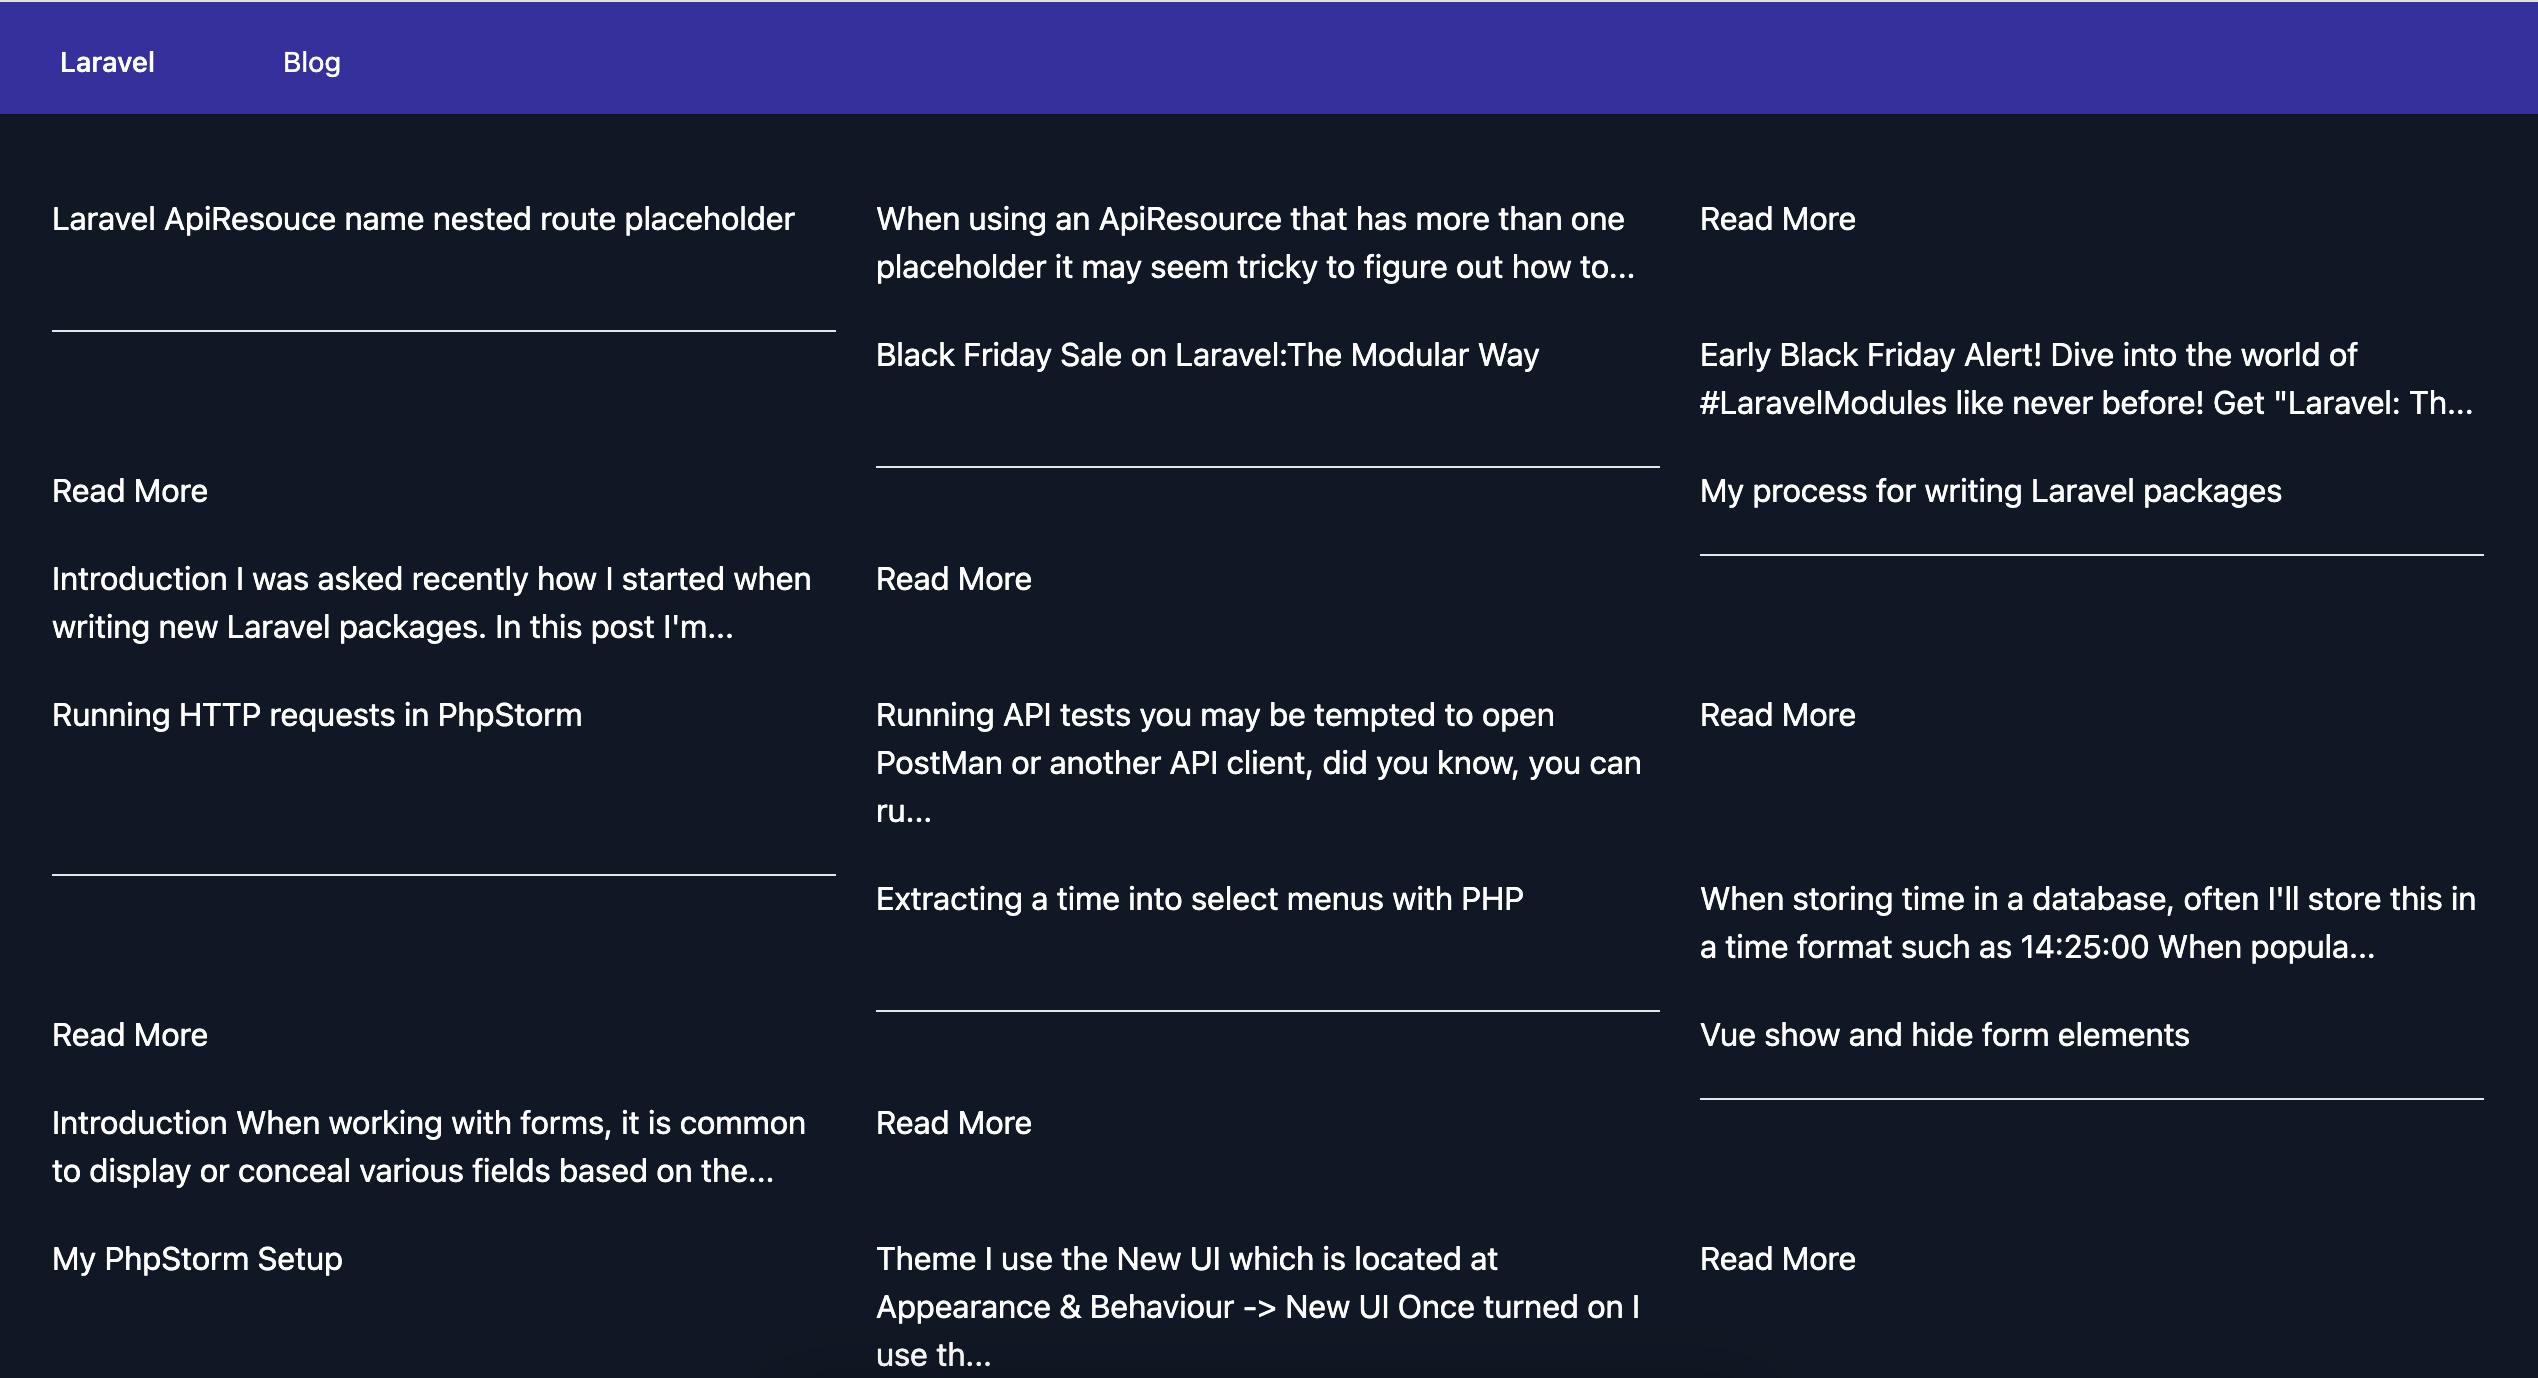
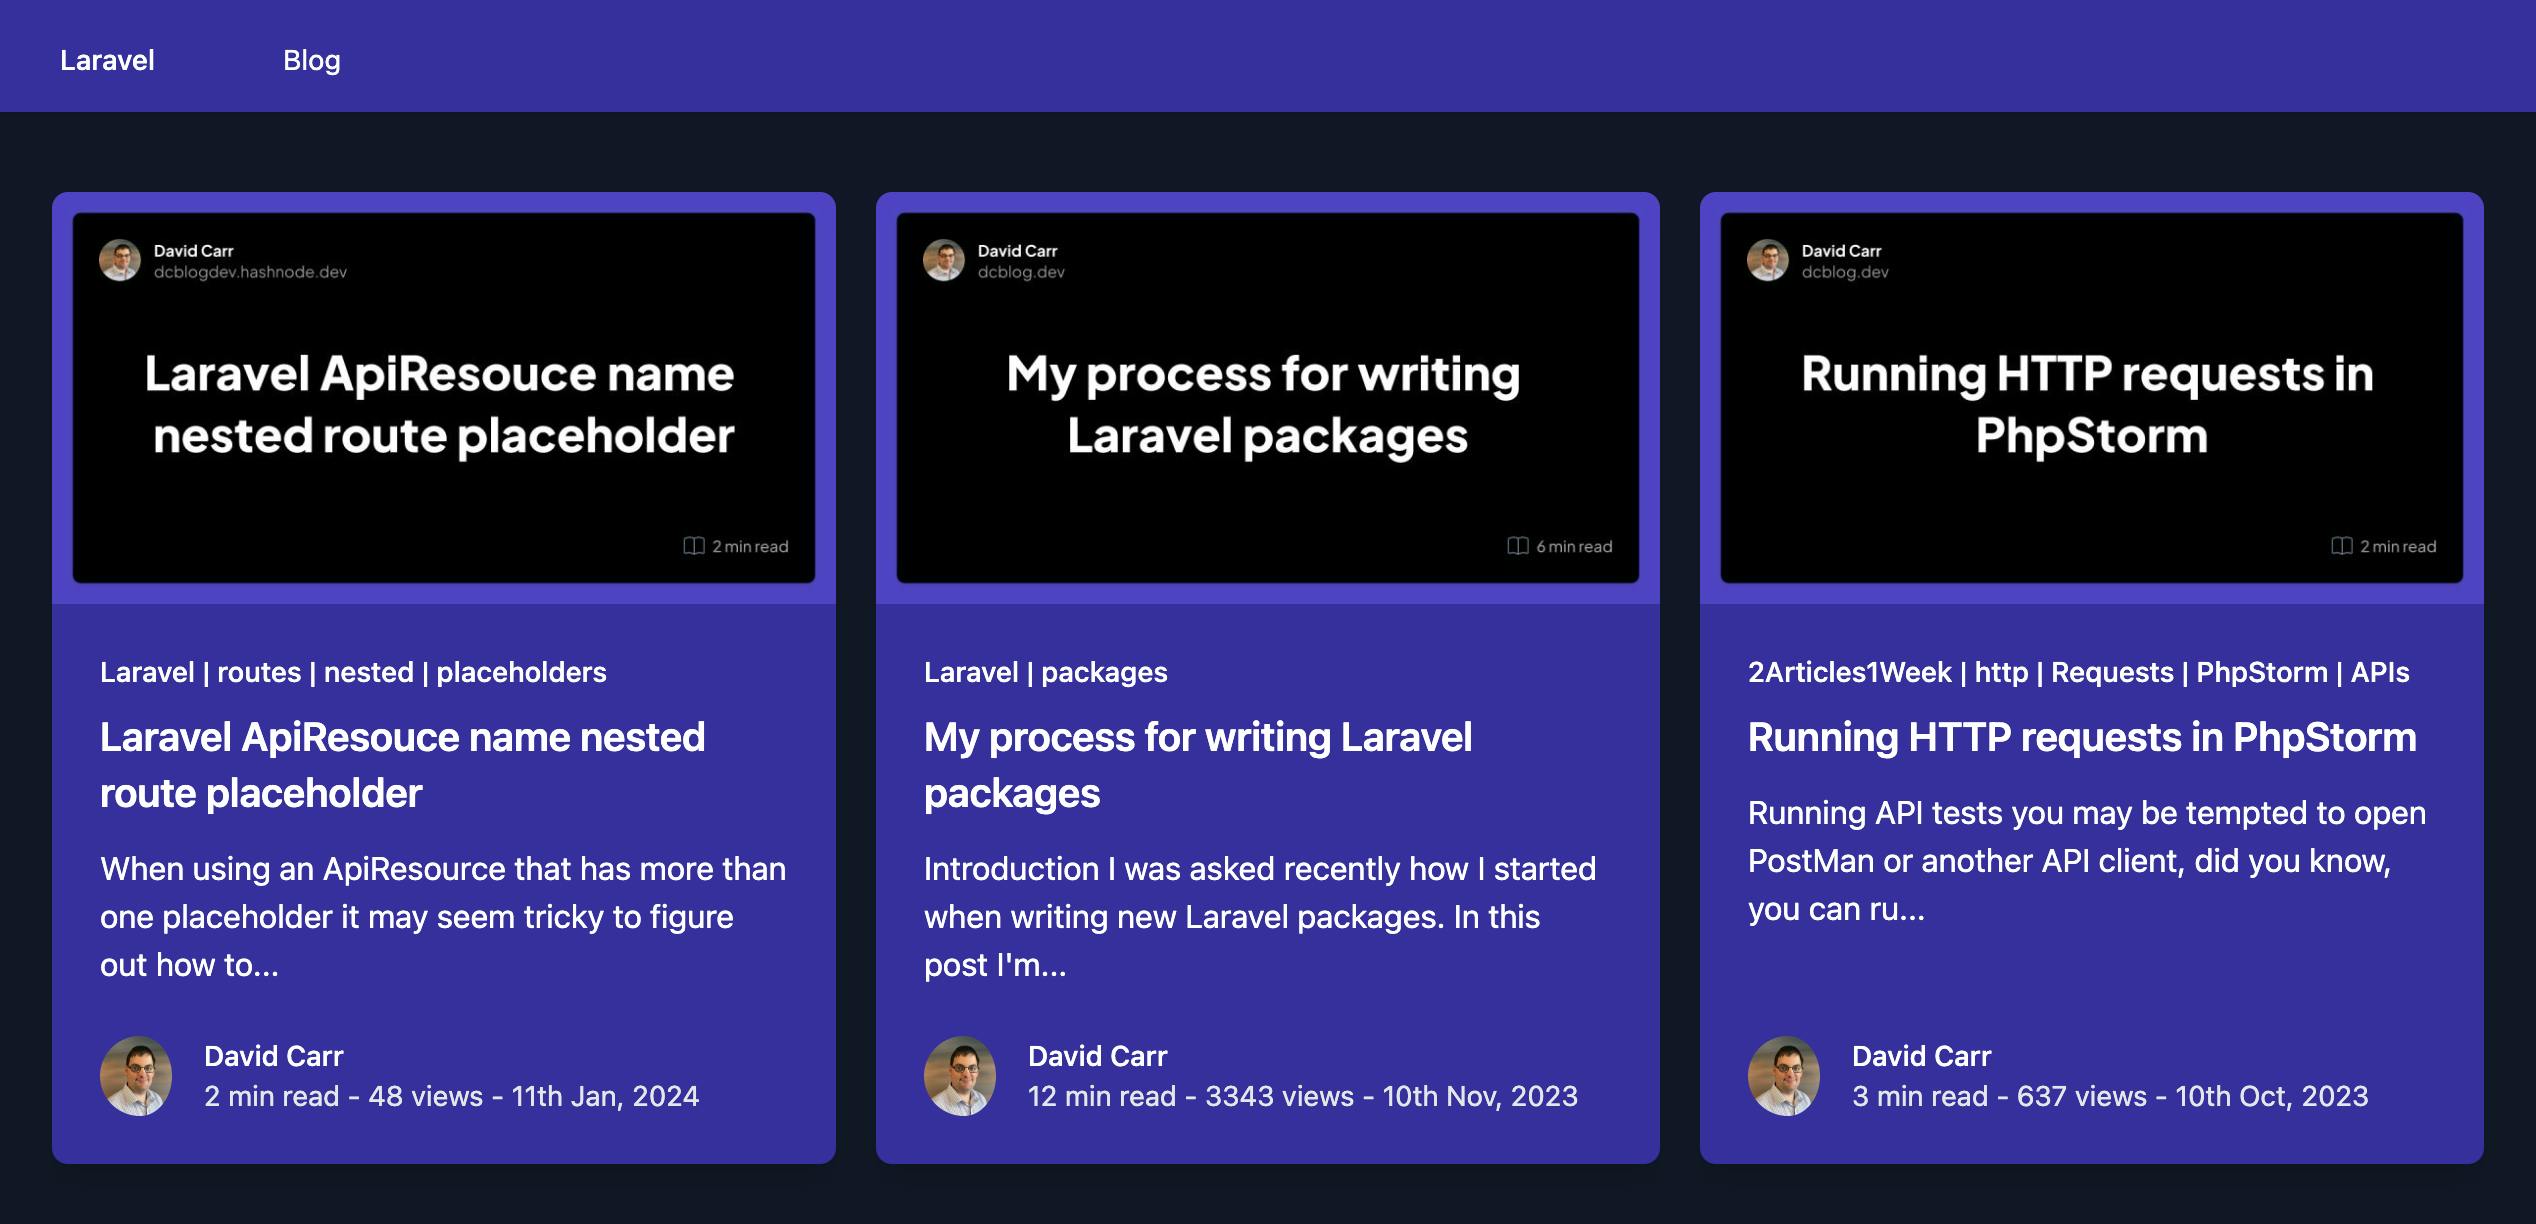
The page now has a three-column grid:
Next, add a div around the post content:
<div class="flex-1 bg-indigo-800 p-6 flex flex-col justify-between">
   ...post content
</div>
Now let's loop over and display any tags that exist, this will link to a URL of /tags/{tag} the route will be created later.
<p class="text-sm leading-5 font-medium text-primary mb-0">
    @foreach($post['tags'] as $tag)
        <a href="{{ url('tag/'.strtolower($tag['slug'])) }}">
            {{ $tag['name'] }}
            @if (!$loop->last) | @endif
        </a>
    @endforeach
</p>
Now style the title and brief:
<a href="{{ url($post['slug']) }}" class="block">
    <h2 class="mt-2 text-xl leading-7 font-semibold">
        {{ $post['title'] }}
    </h2>

    <div class="mt-3 text-base leading-6 text-white">
        {!! Str::limit($post['brief'], 100) !!}
    </div>
</a>
Now we want to show the author details and link the author back to their Hashnode profile.
<div class="mt-6 flex items-center">
    <div class="flex-shrink-0">
        @if (!empty($post['author']['profilePicture']))
            <a href='{{ 'https://hashnode.com/@'.$post['author']['username'] }}'>
                <img class="w-10 h-10 pr-1 rounded-full" src="{{ $post['author']['profilePicture'] }}" alt="{{ $post['author']['name'] }}">
            </a>
        @endif
    </div>
    <div class="ml-3">
        <p class="text-sm mb-0 font-medium text-primary">
            <a href="{{ 'https://hashnode.com/@'.$post['author']['username'] }}" class="hover:underline">{{ $post['author']['name'] }}</a>
        </p>
        <div class="flex text-sm text-gray-200 dark:text-gray-200">
            <p>
                {{ $post['readTimeInMinutes']}} min read -
                {{ $post['views'] }} views -
                <time datetime="{{ $post['publishedAt'] }}">{{ date('jS M, Y', strtotime($post['publishedAt'])) }}</time>
            </p>
        </div>
    </div>
</div>
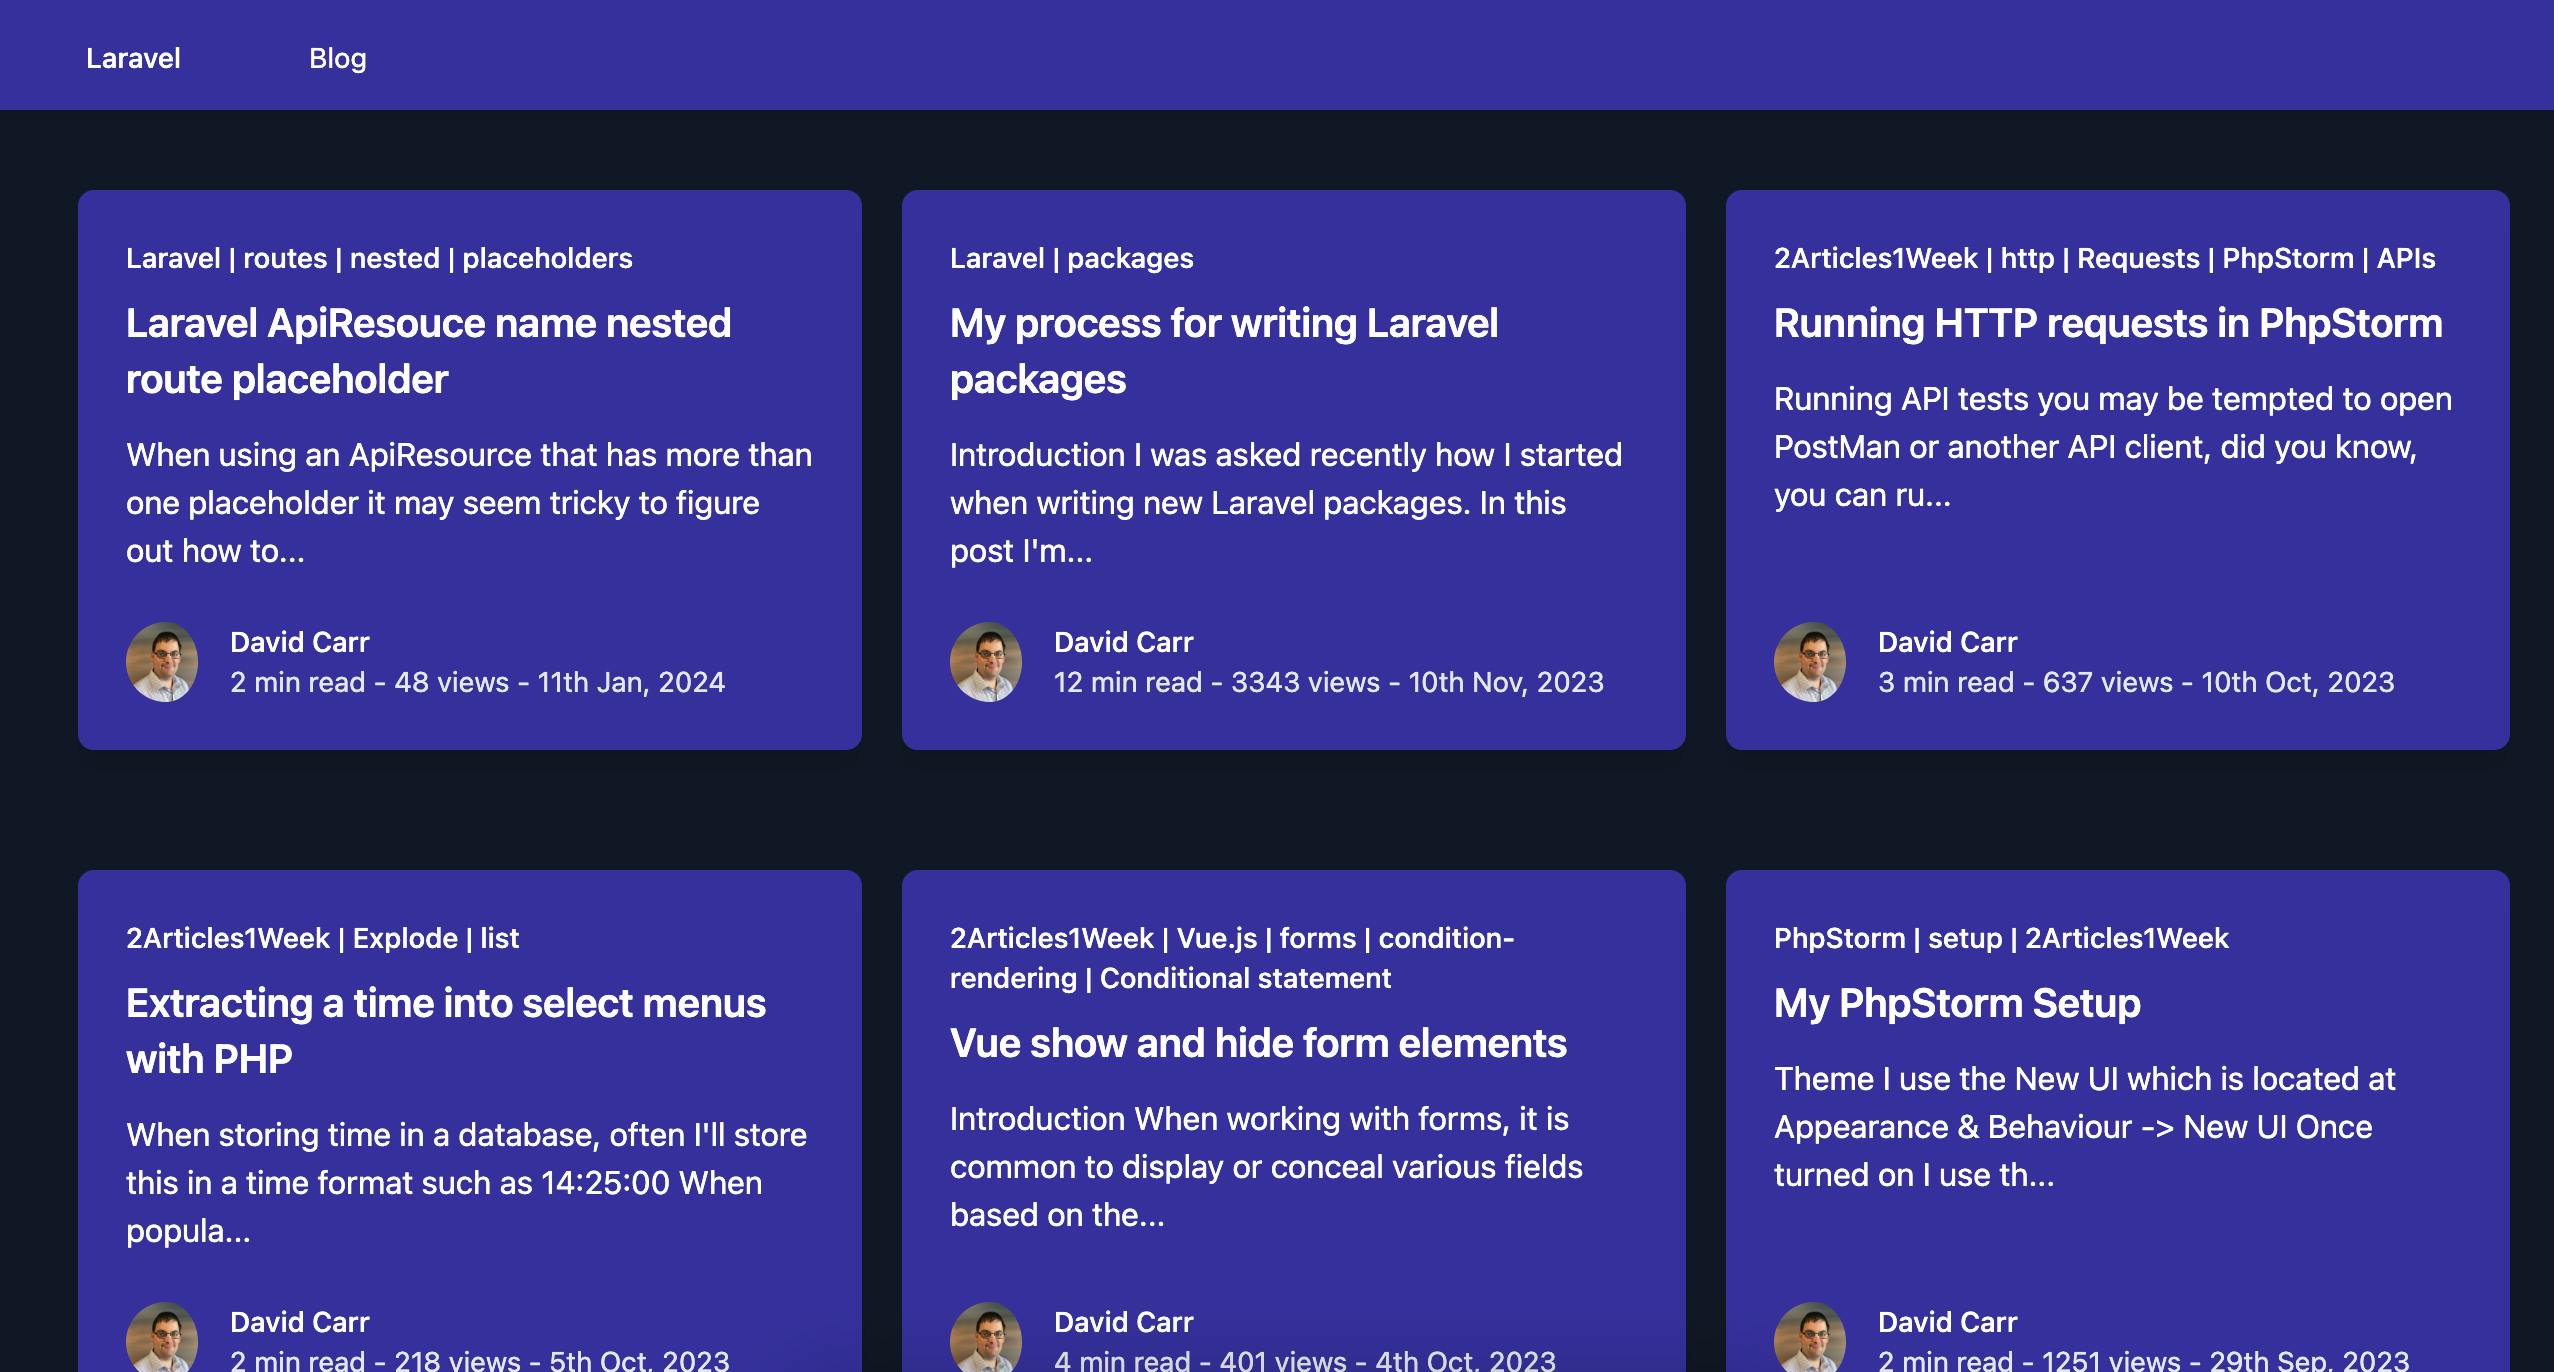
The Blog is looking much better, the final step is to add the post Image should it exist.
@if(!empty($post['coverImage']['url']))
    <div class="flex-shrink-0">
        <a href="{{ url($post['slug']) }}" class="block">
            <img class="w-full object-cover rounded-t-lg" src="{{ $post['coverImage']['url'] }}" alt="">
        </a>
    </div>
@endif
Putting it all together:
<div class="grid gap-5 max-w-lg mx-auto lg:grid-cols-3 lg:max-w-none">
@foreach($posts as $post)

    @php $post = $post['node']; @endphp

    <div class="flex flex-col rounded-lg shadow-lg overflow-hidden mb-10">

        @if(!empty($post['coverImage']['url']))
            <div class="flex-shrink-0">
                <a href="{{ url($post['slug']) }}" class="block">
                    <img class="w-full object-cover rounded-t-lg" src="{{ $post['coverImage']['url'] }}" alt="">
                </a>
            </div>
        @endif

        <div class="flex-1 bg-indigo-800 p-6 flex flex-col justify-between">
            <div class="flex-1">
                <p class="text-sm leading-5 font-medium text-primary mb-0">
                    @foreach($post['tags'] as $tag)
                        <a href="{{ url('tag/'.strtolower($tag['slug'])) }}">
                            {{ $tag['name'] }}
                            @if (!$loop->last) | @endif
                        </a>
                    @endforeach
                </p>
                <a href="{{ url($post['slug']) }}" class="block">
                    <h2 class="mt-2 text-xl leading-7 font-semibold">
                        {{ $post['title'] }}
                    </h2>

                    <div class="mt-3 text-base leading-6 text-white">
                        {!! Str::limit($post['brief'], 100) !!}
                    </div>
                </a>
            </div>
            <div class="mt-6 flex items-center">
                <div class="flex-shrink-0">
                    @if (!empty($post['author']['profilePicture']))
                        <a href='{{ 'https://hashnode.com/@'.$post['author']['username'] }}'>
                            <img class="w-10 h-10 pr-1 rounded-full" src="{{ $post['author']['profilePicture'] }}" alt="{{ $post['author']['name'] }}">
                        </a>
                    @endif
                </div>
                <div class="ml-3">
                    <p class="text-sm mb-0 font-medium text-primary">
                        <a href="{{ 'https://hashnode.com/@'.$post['author']['username'] }}" class="hover:underline">{{ $post['author']['name'] }}</a>
                    </p>
                    <div class="flex text-sm text-gray-200 dark:text-gray-200">
                        <p>
                            {{ $post['readTimeInMinutes']}} min read -
                            {{ $post['views'] }} views -
                            <time datetime="{{ $post['publishedAt'] }}">{{ date('jS M, Y', strtotime($post['publishedAt'])) }}</time>
                        </p>
                    </div>
                </div>
            </div>
        </div>
    </div>
@endforeach
</div>
Much better.
Working with tags
Now the listing of posts is in place, let's focus on tags, we have tags being displayed in the posts. What we want is to be able to click on a tag and see all posts matching that tag.
Create a new route:
This will respond to the URL /tag/{tag} ie /tag/laravel and load a tag method.
Route::get('tag/{tag}', [BlogController::class, 'tag']);
Next, add the controller method:
public function tag(HashnodeService $hashnodeService, $tag)
{
    return view('blog.tag', [
        'tag' => $tag,
        'posts' => $hashnodeService->getPostsByTag($tag)['edges']
    ]);
}
This loads up a view called tag and passes the tag and the posts. This time the HashnodeService class calls a getPostsByTag($tag) method.
Next, add a method called getPostsByTag($tag):
The method accepts a $tag. This is the same query as the posts except in the posts method there is a filter:
filter: { tagSlugs: ["'.$tag.'"] }
public function getPostsByTag(string $tag): array
{
    $response = Http::post($this->url, [
        'query' => 'query Publication {
          publication(host: "' . $this->host . '") {
            posts(first: 10, filter: { tagSlugs: ["'.$tag.'"] }) {
              edges {
                node {
                  title
                  slug
                  brief
                  readTimeInMinutes
                  publishedAt
                  views
                  url
                  coverImage {
                    url
                  }
                  tags {
                    name
                    slug
                  }
                  author {
                    name
                    username
                    profilePicture
                  }
                }
              }
            }
          }
        }'
    ]);

    $publication = $response->json()['data']['publication'];

    if ($publication === null) {
        abort(400, 'Hashnode host not found');
    }

    return $publication['posts'];
}
Now create a tag.blade.php file and enter:
@extends('layouts.app')
@section('title', "Post by Tag: $tag")
@section('content')

    <p class="py-5 text-xl">Posts by tag: {{ $tag }}</p>

    @include('blog.posts', ['posts' => $posts])

@endsection
This will load the posts up and display a message of "Posts by tag: X"
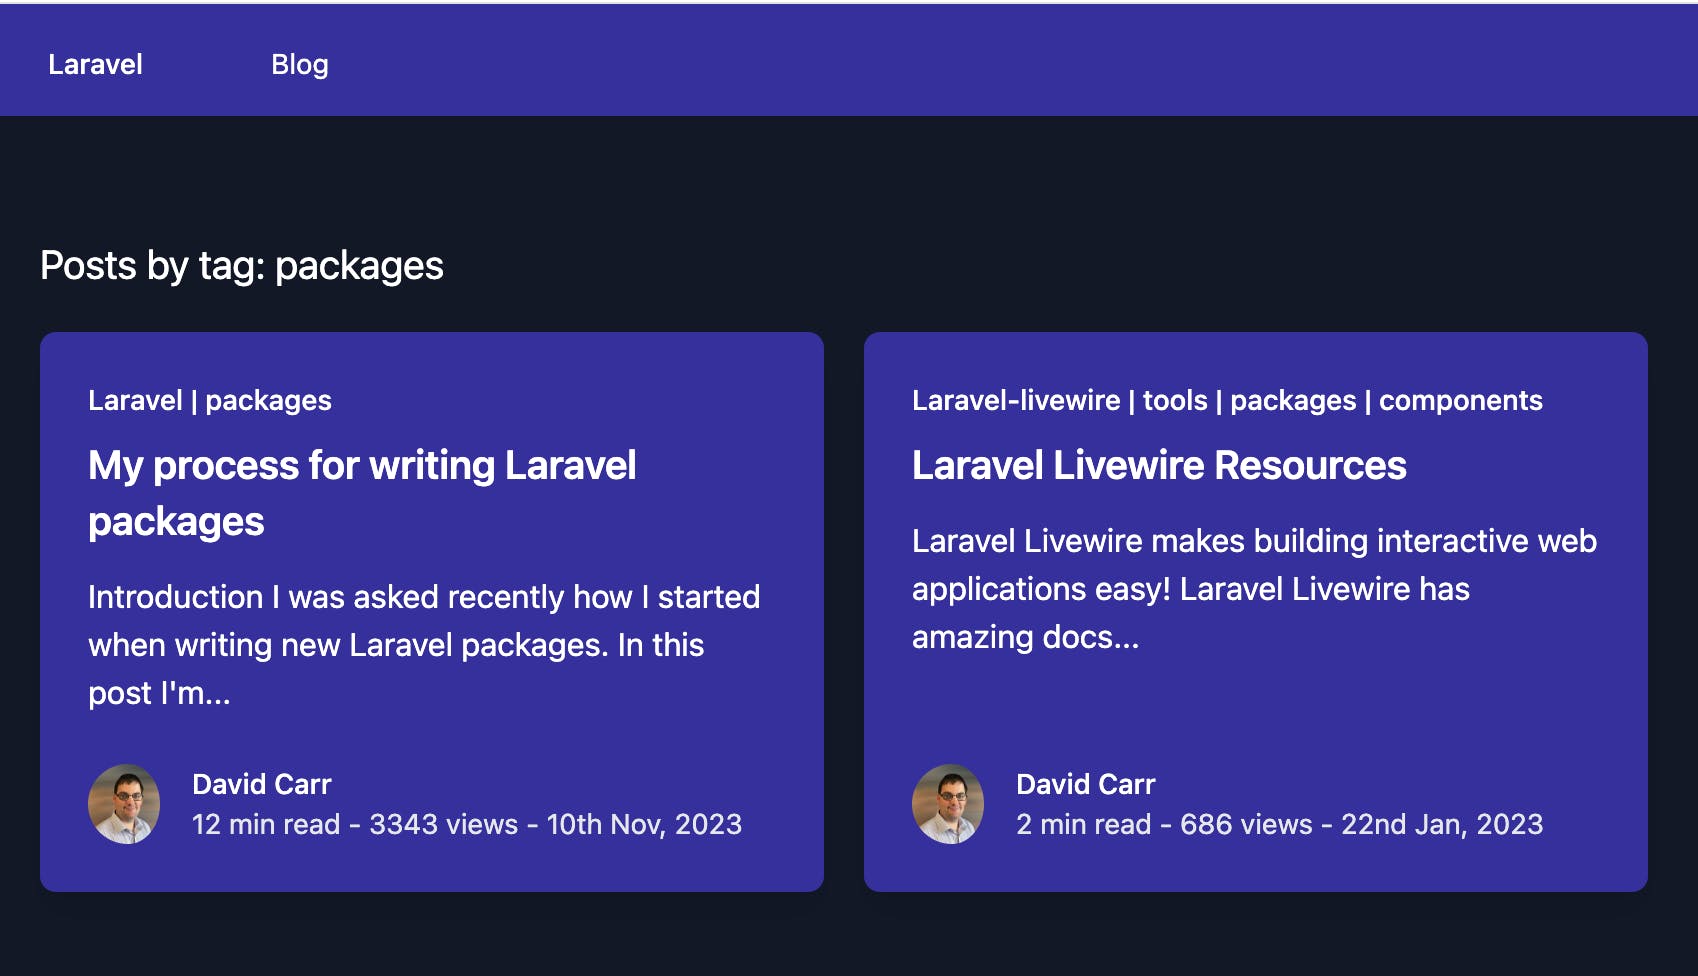
That's it, now you can filter posts by clicking on any tag that exists.
Implement pagination
The Hashnode API uses paging for posts, looking over our query to read posts we have posts(first: 10) which loads up 10 posts.
This is great and very fast but how do we get the next page of posts?
What we need to do is update the existing query to return paging information in its response.
We need to add pageInfo to the fields:
pageInfo {
  endCursor,
  hasNextPage
}
This goes alongside the edges like this:
posts(first: 10) {
  edges {
    node {
      title
      slug
      ...
    }
  }
  pageInfo {
    endCursor,
    hasNextPage
  }
}
This will now return a pageInfo block in the response. If there is a next page then hasNextPage will be true. The endCursor can be used to tell the API to start from this cursor.
"pageInfo" => array:2 [▼
    "endCursor" => "NjQxODg4ZWY4Y2ExNWM0MzdiMzE2ZmYxXzIwMjMtMDMtMThUMTI6MjQ6MDAuMDAwWg=="
     "hasNextPage" => true
]
Inside the posts() method of the GraphQL query we can pass after: and pass in the endCursor.
Updating our query to support this now looks like this:
if (request()->has('next')) {
    $after = request()->input('next');
} else {
    $after = '';
}

$response = Http::post($this->url, [
    'query' => 'query Publication {
      publication(host: "' . $this->host . '") {
        posts(first: 10, after: "' . $after . '") {
          edges {
            node {
              title
              slug
              brief
              readTimeInMinutes
              publishedAt
              views
              url
              coverImage {
                url
              }
              tags {
                name
                slug
              }
              author {
                name
                username
                profilePicture
              }
            }
          }
          pageInfo {
            endCursor,
            hasNextPage
          }
        }
      }
    }'
]);
All that's left is to add a button on the listing page to show the next button.
We would update the BlogControllers array to include the pageInfo:
return view('blog.index', [
    'posts' => $hashnodeService->getPosts()['edges'],
    'pageInfo' => $hashnodeService->getPosts()['pageInfo'],
]);
And in any view add a button as long as there is a next page. It makes sense to add this to the end of the posts.blade.php file.
@if($pageInfo['hasNextPage'])
    <div class="flex justify-center">
        <a class="bg-indigo-600 text-white px-2 py-2.5 mb-10 rounded-md" href="{{ url('?next='.$pageInfo['endCursor']) }}">Next Page</a>
    </div>
@endif
Update both methods of the blog controller to return the pageInfo:
public function index(HashnodeService $hashnodeService)
{
    return view('blog.index', [
        'posts' => $hashnodeService->getPosts()['edges'],
        'pageInfo' => $hashnodeService->getPosts()['pageInfo'],
    ]);
}

public function tag(HashnodeService $hashnodeService, $tag)
{
    return view('blog.tag', [
        'tag' => $tag,
        'posts' => $hashnodeService->getPostsByTag($tag)['edges'],
        'pageInfo' => $hashnodeService->getPosts()['pageInfo'],
    ]);
}
Viewing a post
Listing posts and filtering by tags is in place, let's tackle seeing a single post.
We want a post to load up when going to /{slug} to accommodate this create a route, and ensure it's the last route as it's what's called a catch-all route.
A catch-up route is a route that will catch anything you pass and will then stop, so it needs to come after all other routes.
Route::get('{slug}', [BlogController::class, 'show']);
Next, create a method in the controller:
public function show(HashnodeService $hashnodeService, $slug)
{
    return view('blog.show', [
        'post' => $hashnodeService->getPost($slug),
    ]);
}
Now we need to add a getPost($slug) method to the Hashnode service.
This query uses a post method which accepts a slug. In the fields instead of requesting brief a field called content is used. Content needs to be told which format to use, in this example we've asked for both html and markdown:
public function getPost(string $slug): array
{
    $response = Http::post($this->url, [
        'query' => 'query Publication {
          publication(host: "' . $this->host . '") {
            post(slug: "'.$slug.'") {
              title
              slug
              content {
                html,
                markdown
              }
              readTimeInMinutes
              publishedAt
              url
              coverImage {
                url
              }
              tags {
                name
                slug
              }
              author {
                name
                username
                profilePicture
              }
            }
          }
        }'
    ]);

    $post = $response->json()['data']['publication']['post'];

    if ($post === null) {
        abort(404);
    }

    return $post;
}
If the post does not exist then we fire off a 404 event otherwise the post is returned.
Now we need to create a show.blade.php file to show the post. This will be similar to the post file but instead of looping we can access $post right away:
For syntax highlighting we're using highligh.js to define the markup inside a @section('meta') this allows this to be injected into the layout file so only this page will contain this code.
@extends('layouts.app')
@section('title', $post['title'])

@section('meta')
<link rel="stylesheet" href="https://cdnjs.cloudflare.com/ajax/libs/highlight.js/11.9.0/styles/default.min.css">
<script src="https://cdnjs.cloudflare.com/ajax/libs/highlight.js/11.9.0/highlight.min.js"></script>
<script src="https://cdnjs.cloudflare.com/ajax/libs/highlight.js/11.9.0/languages/php.min.js"></script>
<script>hljs.highlightAll();</script>
@endsection

@section('content')

<div class="container max-w-screen-lg pb-16 mx-auto">

    <div class="overflow-hidden mb-10 px-8 py-4 rounded-lg">

        @if(!empty($post['coverImage']['url']))
            <div class="flex-shrink-0">
                <a href="{{ url($post['slug']) }}" class="block">
                    <img class="w-full object-cover rounded-t-lg" src="{{ $post['coverImage']['url'] }}" alt="">
                </a>
            </div>
        @endif

        <h1 class="text-white text-4xl text-center mt-10">{{ $post['title'] }}</h1>

        <p class="text-sm leading-5 font-medium text-primary mb-0">
            @foreach($post['tags'] as $tag)
                <a href="{{ url('tag/'.strtolower($tag['slug'])) }}">
                    {{ $tag['name'] }}
                    @if (!$loop->last) | @endif
                </a>
            @endforeach
        </p>

        <div class="flex items-center mt-6 mb-6">

            @if(!empty($post['author']['profilePicture']))
                <div class="flex-shrink-0">
                    <a href='{{ 'https://hashnode.com/@'.$post['author']['username'] }}'>
                        <img class="w-10 h-10 pr-1 rounded-full" src="{{ $post['author']['profilePicture'] }}" alt="{{ $post['author']['name'] }}">
                    </a>
                </div>
            @endif

            <div class="ml-3">
                <p class="text-sm mb-0 font-medium text-primary">
                    <a href="{{ 'https://hashnode.com/@'.$post['author']['username'] }}" class="hover:underline">{{ $post['author']['name'] }}</a>
                </p>
                <div class="flex text-sm leading-5 text-gray-500 dark:text-gray-200">
                    <p>{{ $post['readTimeInMinutes']}} min read - {{ date('jS M, Y', strtotime($post['publishedAt'])) }}</p>
                </div>
            </div>

        </div>

        <article class="mx-auto">

            <p class="text-sm leading-5 font-medium text-primary mb-0">
                @foreach($post['tags'] as $tag)
                    <a href="{{ url('tag/'.strtolower($tag['name'])) }}">
                        {{ $tag['name'] }}
                        @if (!$loop->last) | @endif
                    </a>
                @endforeach
            </p>

            <div class="dark:prose lg:prose-xl">
            {!! $post['content']['html'] !!}
            </div>

        </article>

    </div>

</div>

@endsection
If the page does not look correct, and you are running npm run dev then stop it and run npm run build sometimes running the build provides better results.
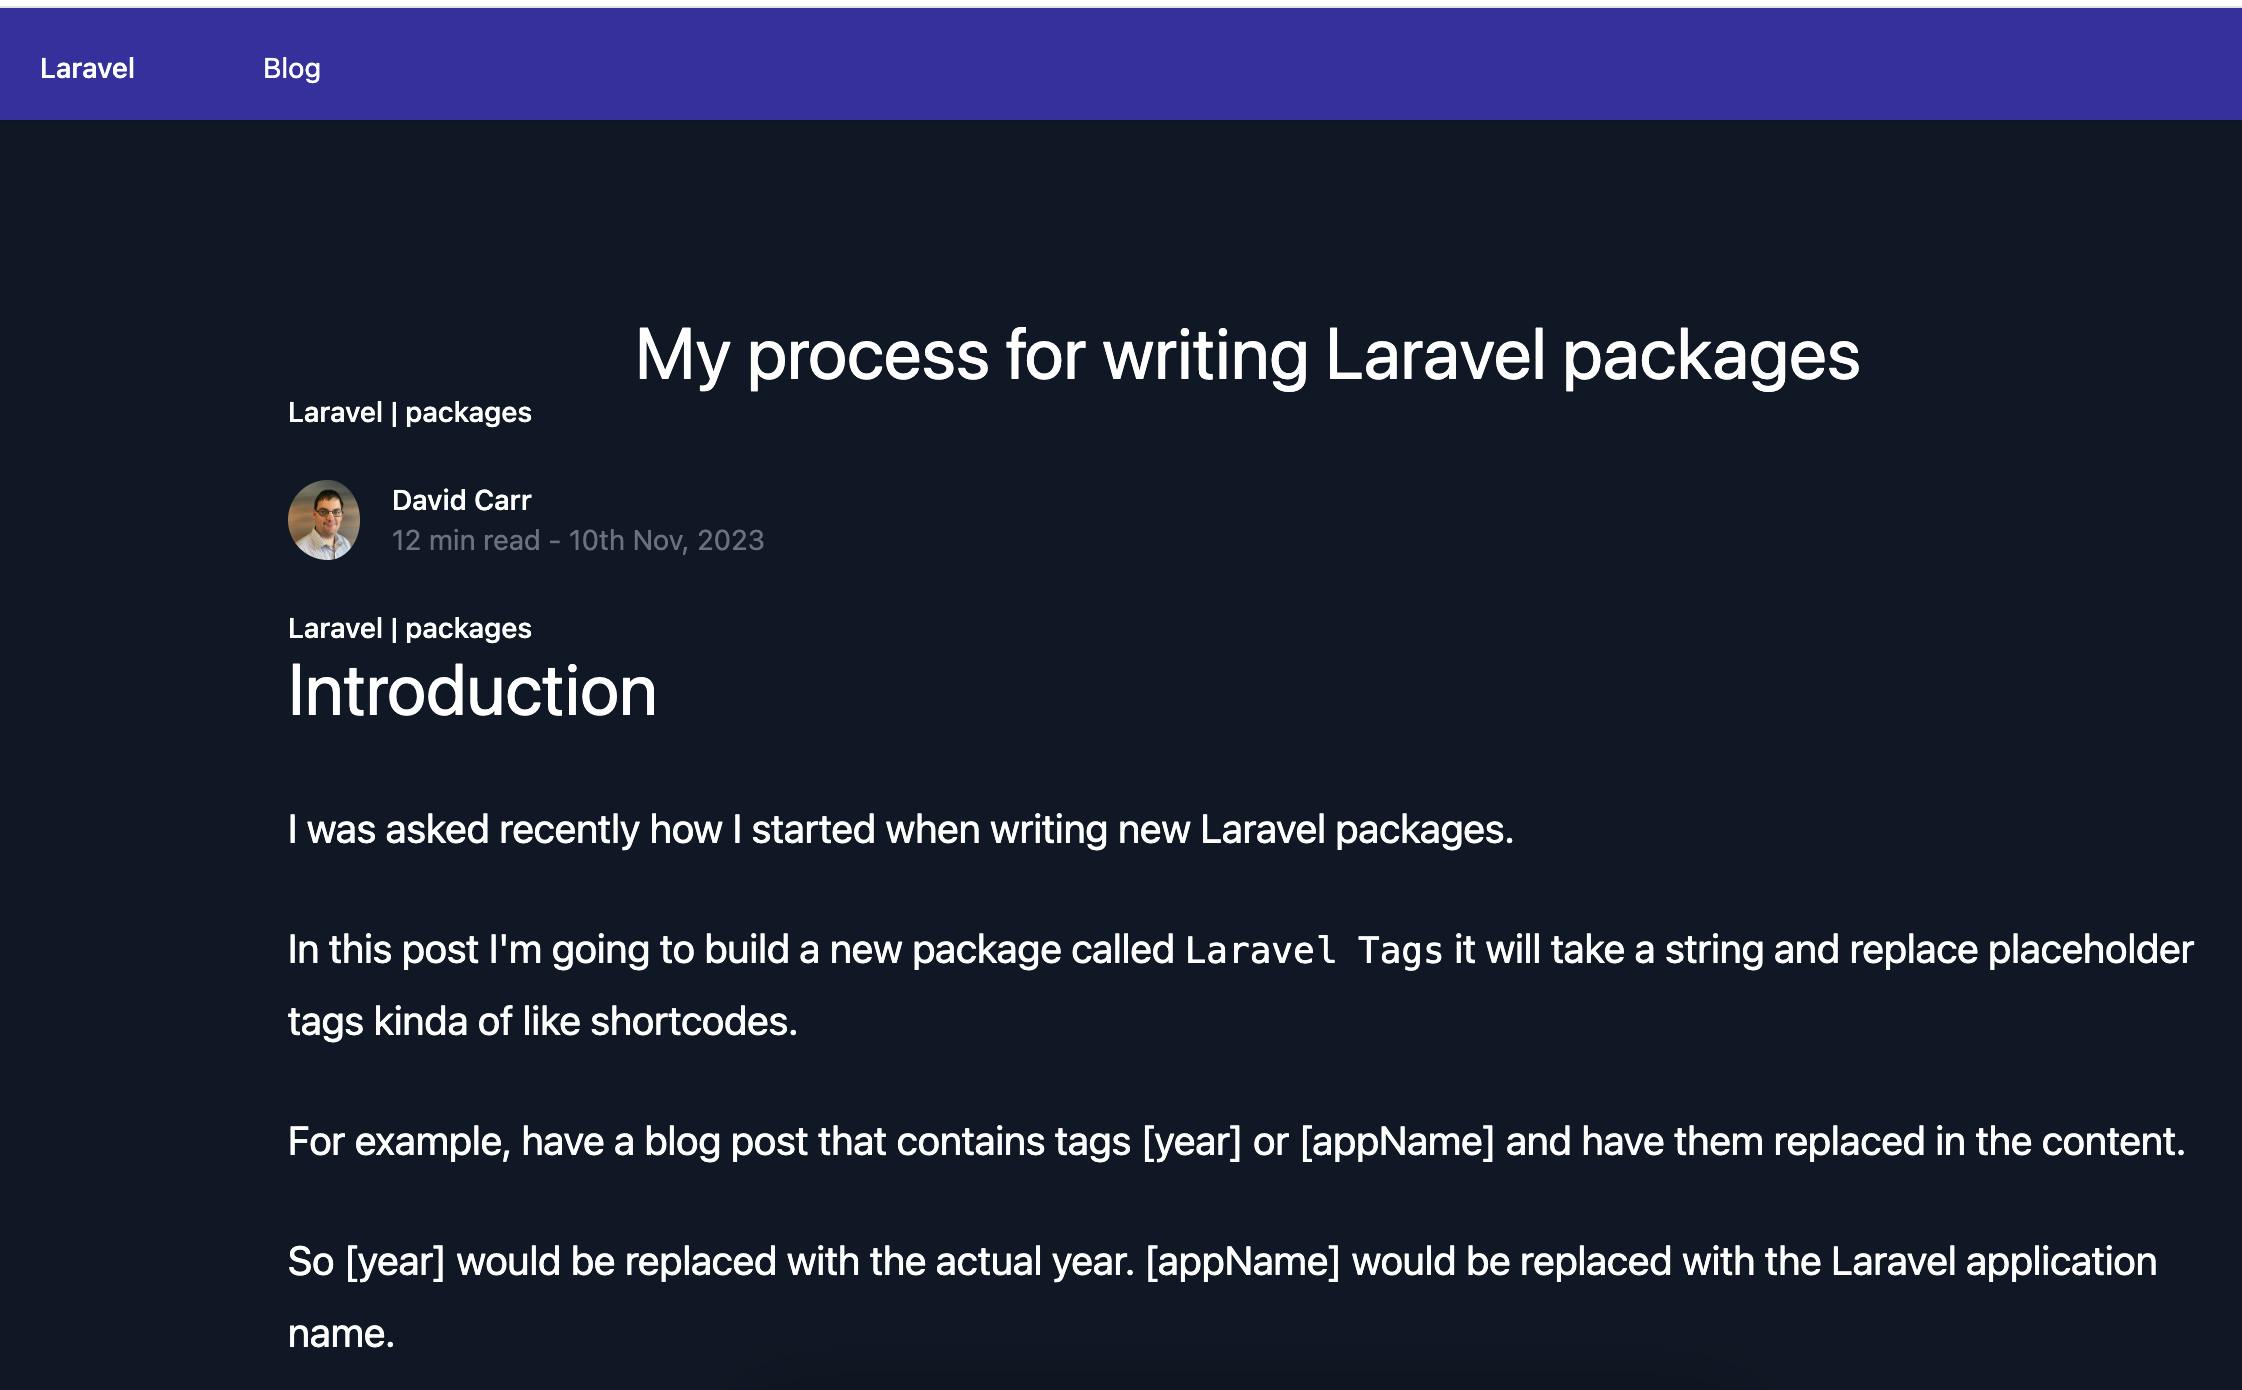
Viewing a post by the URL domain/{slug}
{slug} = being the post slug field that a post contains ie:
domain/a-sample-post
Will now render a post:
Setting up a test environment using Pest
My testing framework of choice is Pest let's install Pest using Composer:
Find out more about Pest atpestphp.com
composer require pestphp/pest --dev --with-all-dependencies
Since we're using Laravel it makes sense to install the Laravel plugin
composer require pestphp/pest-plugin-laravel --dev
Secondly, you'll need to initialize Pest in your current PHP project. This step will create a configuration file named Pest.php at the root level of your test suite, which will enable you to fine-tune your test suite later.
./vendor/bin/pest --init
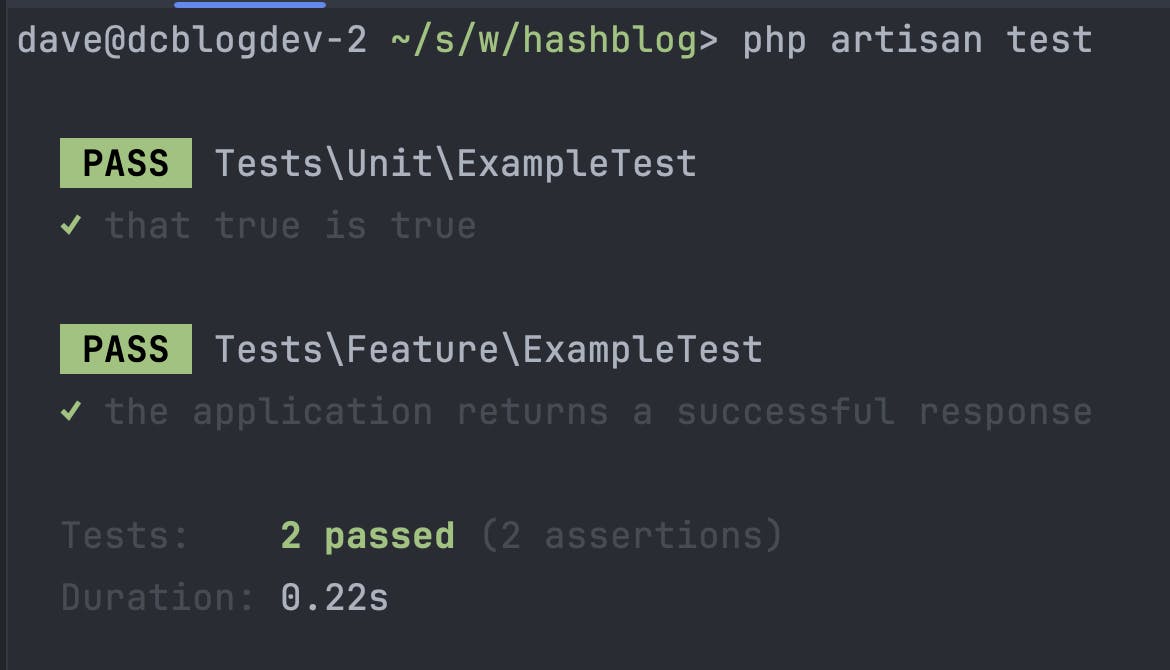
To run a test, at any time using Artisan:
php artisan test
Or use pest directly:
./vendor/bin/pest
This will run the following tests:
Make our test file called BlogTest inside tests/Feature
Create a new file called BlogTest.php
Add a method that tests whether the blog listing page can load, in this case, the home page.
<?php

use function Pest\Laravel\get;

test('can see blog page', function () {
    get('/')
        ->assertOk()
        ->assertViewHas('posts', function ($posts) {
            return count($posts) === 2;
        });
});
This checks we get a 200 status code when going to the home page.
Also, it checks there is a view called 'posts` and that the view received an array with 2 posts.
This will fail if the blog you're using has more than 2 posts as the test runs the application code and pulls down the posts from Hashnode.
Instead, let's fake this so we can control what data we're testing for.
Remember we don't want to test the API but we do want to task our application that uses the responses from the API.
Since the HashnodeService uses the HTTP client we can fake it by calling Http::fake
We can fake when a call is made to gql.hashnode.com don't actually run it and instead return a fake response:
Http::fake(['https://gql.hashnode.com/' => Http::response([
        'data' => [
            ...
        ]
    ])
]);
Our updated test now looks like this:
test('can see blog page', function () {

    Http::fake(['https://gql.hashnode.com/' => Http::response([
            'data' => [
                'publication' => [
                    'posts' => [
                        'edges' => [
                            [
                                'node' => [
                                    'title' => 'My first post',
                                    'slug' => 'my-first-post',
                                    'brief' => 'This is my first post',
                                    'readTimeInMinutes' => 1,
                                    'publishedAt' => '2021-01-01',
                                    'views' => 1,
                                    'url' => 'https://dcblog.dev/my-first-post',
                                    'coverImage' => [
                                        'url' => 'https://dcblog.dev/my-first-post.jpg'
                                    ],
                                    'tags' => [
                                        [
                                            'name' => 'Laravel',
                                            'slug' => 'laravel'
                                        ]
                                    ],
                                    'author' => [
                                        'name' => 'John Doe',
                                        'username' => 'johndoe',
                                        'profilePicture' => 'https://dcblog.dev/johndoe.jpg'
                                    ]
                                ],
                            ], [
                                'node' => [
                                    'title' => 'My second post',
                                    'slug' => 'my-second-post',
                                    'brief' => 'This is my second post',
                                    'readTimeInMinutes' => 1,
                                    'publishedAt' => '2021-01-01',
                                    'views' => 1,
                                    'url' => 'https://dcblog.dev/my-second-post',
                                    'coverImage' => [
                                        'url' => 'https://dcblog.dev/my-second-post.jpg'
                                    ],
                                    'tags' => [
                                        [
                                            'name' => 'Laravel',
                                            'slug' => 'laravel'
                                        ]
                                    ],
                                    'author' => [
                                        'name' => 'John Doe',
                                        'username' => 'johndoe',
                                        'profilePicture' => 'https://dcblog.dev/johndoe.jpg'
                                    ]
                                ]
                            ]
                        ],
                        'pageInfo' => [
                            'endCursor' => '123',
                            'hasNextPage' => false
                        ]
                    ]
                ]
            ]
        ])
    ]);

    get('/')
        ->assertOk()
        ->assertViewHas('posts', function ($posts) {
            return count($posts) === 2;
        });
});
This test will now pass as we have two posts in our fake response.
We can write a similar test to confirm a single post is returned:
test('posts by tags', function () {

    Http::fake(['https://gql.hashnode.com/' => Http::response([
            'data' => [
                'publication' => [
                    'posts' => [
                        'edges' => [
                            [
                                'node' => [
                                    'title' => 'My first post',
                                    'slug' => 'my-first-post',
                                    'brief' => 'This is my first post',
                                    'readTimeInMinutes' => 1,
                                    'publishedAt' => '2021-01-01',
                                    'views' => 1,
                                    'url' => 'https://dcblog.dev/my-first-post',
                                    'coverImage' => [
                                        'url' => 'https://dcblog.dev/my-first-post.jpg'
                                    ],
                                    'tags' => [
                                        [
                                            'name' => 'Laravel',
                                            'slug' => 'laravel'
                                        ]
                                    ],
                                    'author' => [
                                        'name' => 'John Doe',
                                        'username' => 'johndoe',
                                        'profilePicture' => 'https://dcblog.dev/johndoe.jpg'
                                    ]
                                ]
                            ]
                        ],
                        'pageInfo' => [
                            'endCursor' => '123',
                            'hasNextPage' => false
                        ]
                    ]
                ]
            ]
        ])
    ]);

    get('tag/laravel')
        ->assertOk()
        ->assertViewHas('posts', function ($posts) {
            return count($posts) === 1;
        });
});
Conclusion
In this article, we walked through the process of integrating Hashnode's Public API with a Laravel blog.
We explored how to use GraphQL with Laravel, set up routes, design the blog with TailwindCSS, and implement features like tags and pagination.
We also looked at how to view individual posts and set up a test environment using Pest.
This guide demonstrates how to leverage Hashnode's Public API to seamlessly fetch and display blog posts on a Laravel platform, providing a customized blogging experience while utilizing Hashnode's powerful backend.
The source code is available on GitHub at github.com/dcblogdev/hashblog
For more details on using Hashnode's API please visit apidocs.hashnode.com